
You paid for terrace waterproofing, yet a brown damp patch showed up on your top-floor ceiling after the first heavy rain. A year and another coat later, it is back. Sound familiar?
Most repeat leaks happen because the coating went on before anyone found where the water was actually getting in. Terrace waterproofing only works when the repair matches the cause. This guide shows homeowners how to trace the source of a leak, prepare the surface, compare common methods and ask the right questions before hiring anyone.
Why Terrace Waterproofing Fails and Leaks Keep Coming Back
A flat RCC terrace in most Indian cities takes strong sun, heavy rain and large temperature swings in the same year. The slab expands and contracts, and small cracks open at the weakest points. Water then follows the easiest path down.
The usual weak points are:
- The joint where the parapet wall meets the slab
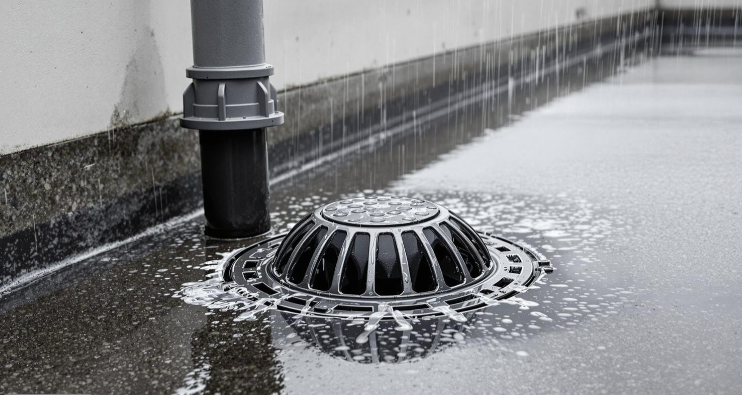
- Cracked or blocked rainwater outlets and downpipes
- Places where pipes, cables or water-tank supports pass through the roof
- Low spots where water collects instead of draining (called ponding)
- An old screed or brick-bat coba layer that has cracked or lost its bond
A fresh coat of terrace waterproofing over the whole roof can hide these problems for a season, but it does not fix them.
Step 1: Trace the Source of the Leak
Start inside the house
Note where the damp patch is, how it spreads, and when it appears: only in heavy rain, or after light showers too? A patch below a parapet wall, a water tank or a drain outlet points to a different cause than one in the middle of the ceiling. Photograph it so you can compare after the repair.
Inspect the terrace on a dry day
Walk the terrace and look for cracks, moss, peeling old coating and dark ponding marks. Check the base of the parapet, every outlet, and the base of any tank or staircase headroom.
Do a simple flood test
With your contractor present, block the outlets and let a shallow layer of water stand on the suspected area for a day or two. Mark the water level and check the ceiling below at intervals. If dampness shows up in only one zone, you know where to focus.
Two precautions: skip the test if you can see wide or growing cracks, and unblock the outlets as soon as it is done, especially if rain is forecast.
Step 2: Prepare the Surface Properly
Preparation often matters more than the product itself. A sound job usually includes:
- Cleaning off dust, loose plaster, algae and the old failed coating
- Opening up cracks and filling them with a suitable repair material
- Forming a small curved fillet at the parapet-slab junction instead of leaving a sharp right angle
- Correcting the slope towards the outlets so water drains instead of pooling
- Clearing and sealing around outlets and pipe openings
- Letting the surface dry to the level the manufacturer specifies before application
Step 3: Compare Common Terrace Waterproofing Methods
No single method suits every roof. The right choice depends on how much the roof moves, how much foot traffic it gets, and whether you plan to lay tiles on top.
Cementitious and polymer-modified coatings
These are easy to apply and common on smaller homes. They are less flexible than other options, so they suit stable surfaces better than roofs with visible movement cracks.
Liquid-applied membranes (acrylic or polyurethane)
These form a seamless, flexible layer that copes better with small movement. Check the product’s technical data sheet for sun exposure, curing time and whether a protective layer is needed.
Sheet membranes (bituminous)
Often chosen for larger roofs. The result depends heavily on a skilled applicator, especially at overlaps, edges and corners, and a protective layer is usually needed on top.
Traditional brick-bat coba
A familiar method across India. It adds weight and builds slope, but it needs periodic inspection because cracks in the coba let water reach the slab.
Whichever method you pick, ask for the manufacturer’s technical data sheet and application guidelines, not just a brand name on the invoice.
Common Terrace Waterproofing Mistakes
- Coating over dirt, loose material or open cracks
- Ignoring the parapet junction, outlets and pipe openings, where leaks often begin
- Applying in damp weather or not allowing proper curing time
- Letting people walk on the fresh layer or place heavy items on it
- Drilling through the finished layer later to fix tanks, solar mounts or antennas
- Accepting a verbal warranty with no written terms
A Realistic Scenario
Consider a two-storey independent house where the top-floor bedroom ceiling shows a damp patch near an outer wall every rainy season. The owner has the entire terrace coated twice, yet the patch keeps returning.
A flood test and inspection then show that water is entering at the parapet junction and through a hairline crack around a rainwater outlet. Repairing those two spots first, followed by a proper coating, would likely have worked better than repeated full-terrace coatings. This is an illustrative example, not a specific case, but leaks that start at one or two weak points are a familiar pattern.
Questions to Ask Before You Hire
- How did you identify the source of the leak, and will you test before and after the work?
- Which product will you use, and can I see its technical data sheet?
- What preparation, curing time and protective layer are included?
- How will you treat the parapet, outlets and pipe openings?
- What does the written warranty cover, for how long, and under what conditions?
Need help finding someone? Our guide to hiring home service experts directly explains what to look for, and you can browse professionals on the HomeConnectors Experts page. For a wider checklist, see Essential Home Maintenance Tips for Every Indian Household.
When to Call a Structural Engineer
Waterproofing treats water, not structural damage. If you see wide or growing cracks, a sagging slab, rust stains, or concrete flaking away from exposed steel, have a structural engineer inspect the building before any coating goes on.
Final Thoughts on Terrace Waterproofing
Good terrace waterproofing starts with a diagnosis, not a product. Find the source, prepare the surface, choose a method that suits your roof, and insist on written terms. Following that order is usually what separates a one-season patch from a repair that lasts.
Before the next heavy rain, spend half an hour walking your terrace, clearing the outlets and photographing any damp patches indoors. That small check gives you the evidence to brief a contractor properly.



Comments